Testnet 2.0 User Guide
Since the launch of Testnet 2.0, we’ve received some requests for a tutorial. Well, we got you👋
Things you need to do before interacting with deBridge testnet:
- Download and set up MetaMask
- Configure custom RPC settings for the testnets: Arbitrum, BSC, HECO and Polygon. As these are all EVM powered networks, they’re all listed on Chainlist.
- Get testnet tokens from faucets: Kovan (ETH), BSC (BNB), HECO (HT) or Polygon (MATIC).
Step 1: Connect Wallet (MetaMask)
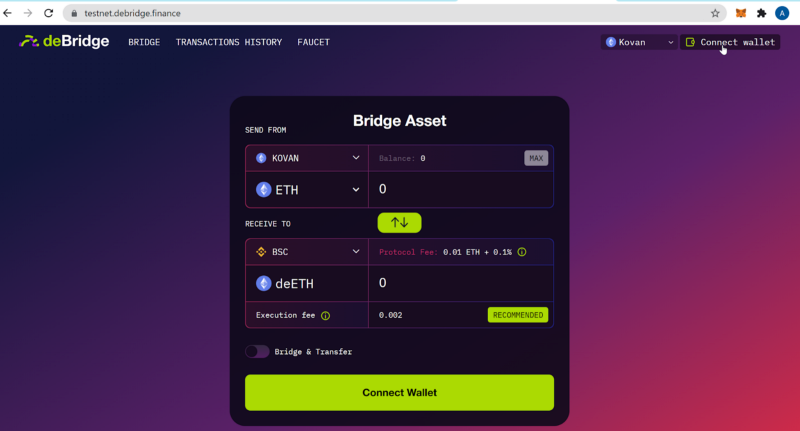
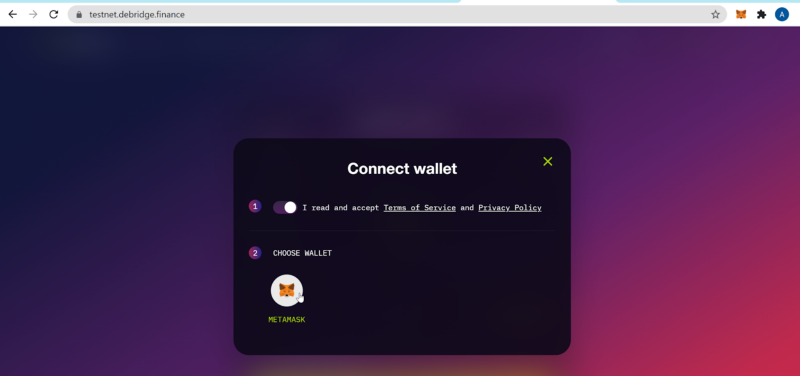
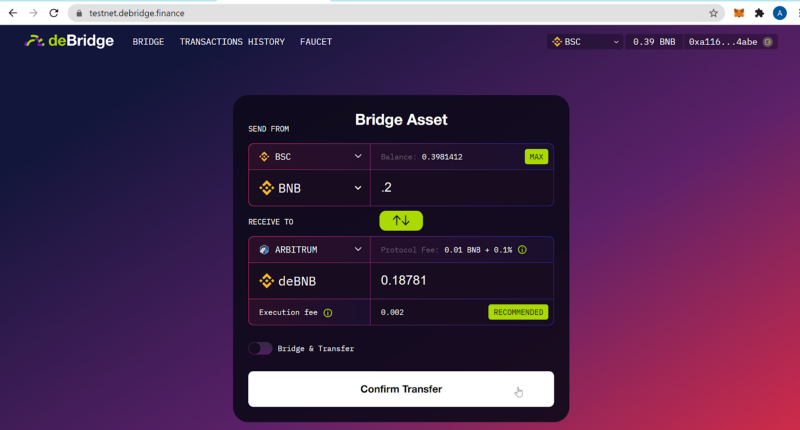
Step 2: Select network and token of choice. Input desired amount (make sure amount is sufficient to cover fees).
You can select other tokens not in the list, by importing the token contract address.
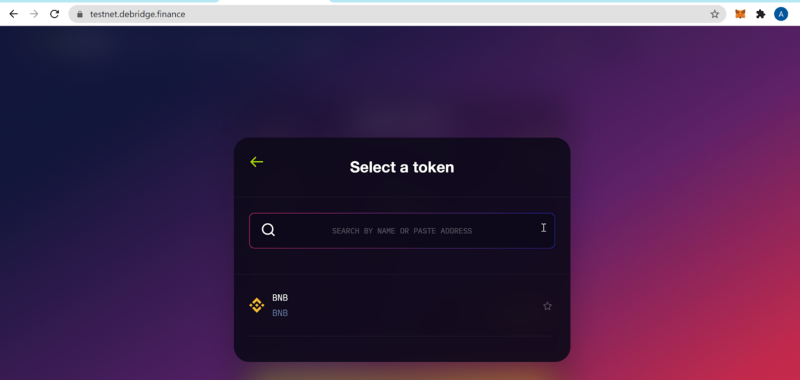
In this example, we’re sending BNB from BSC to Arbitrum.
“Confirm Transfer” to send to the same wallet account.
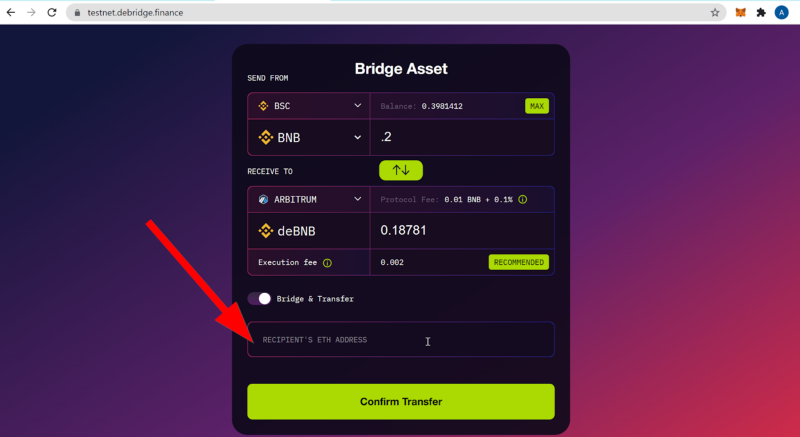
Or if you’re sending to a different account, choose “Bridge & Transfer” and input the receiver’s address.
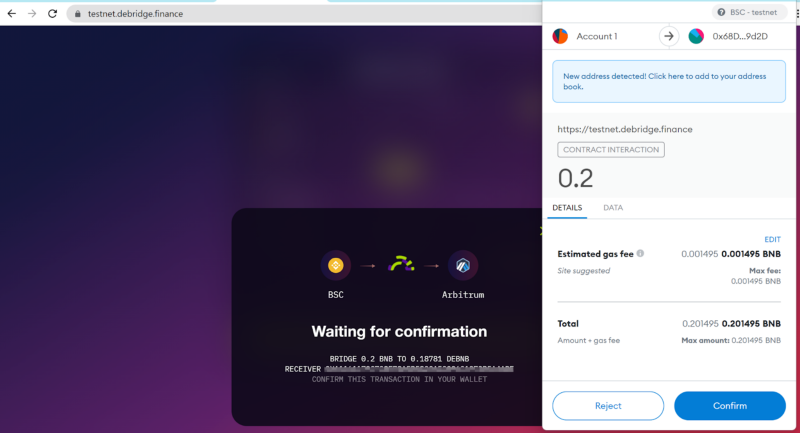
Step 3: Confirm the Transaction
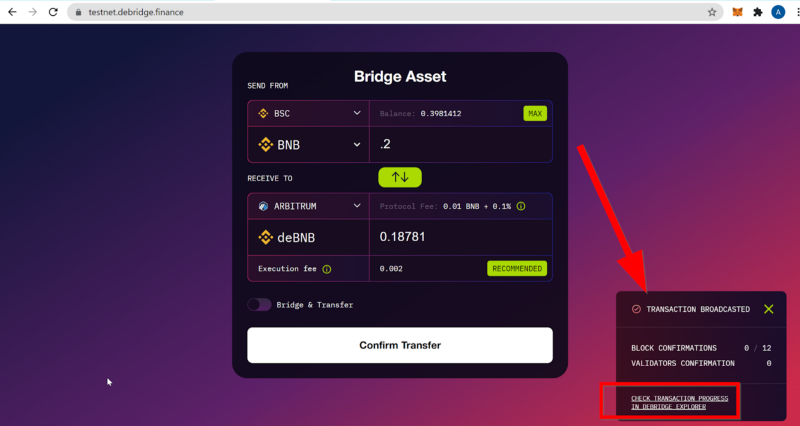
A window will appear indicating the transaction has been broadcasted. Click on the link to view Tx in deBridge explorer.
Transaction details are shown.
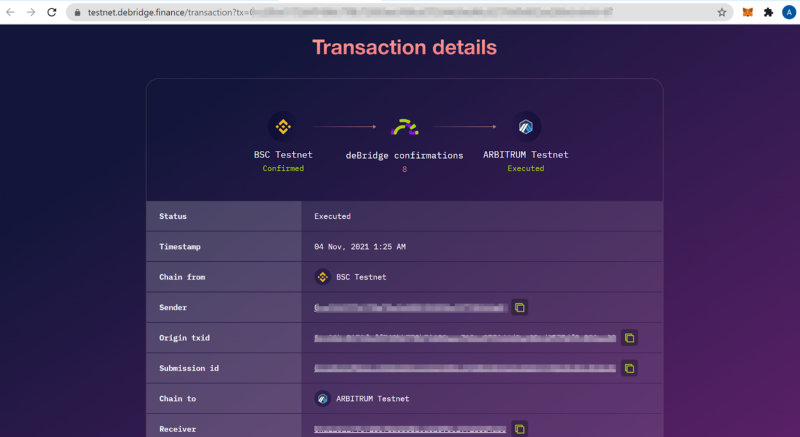
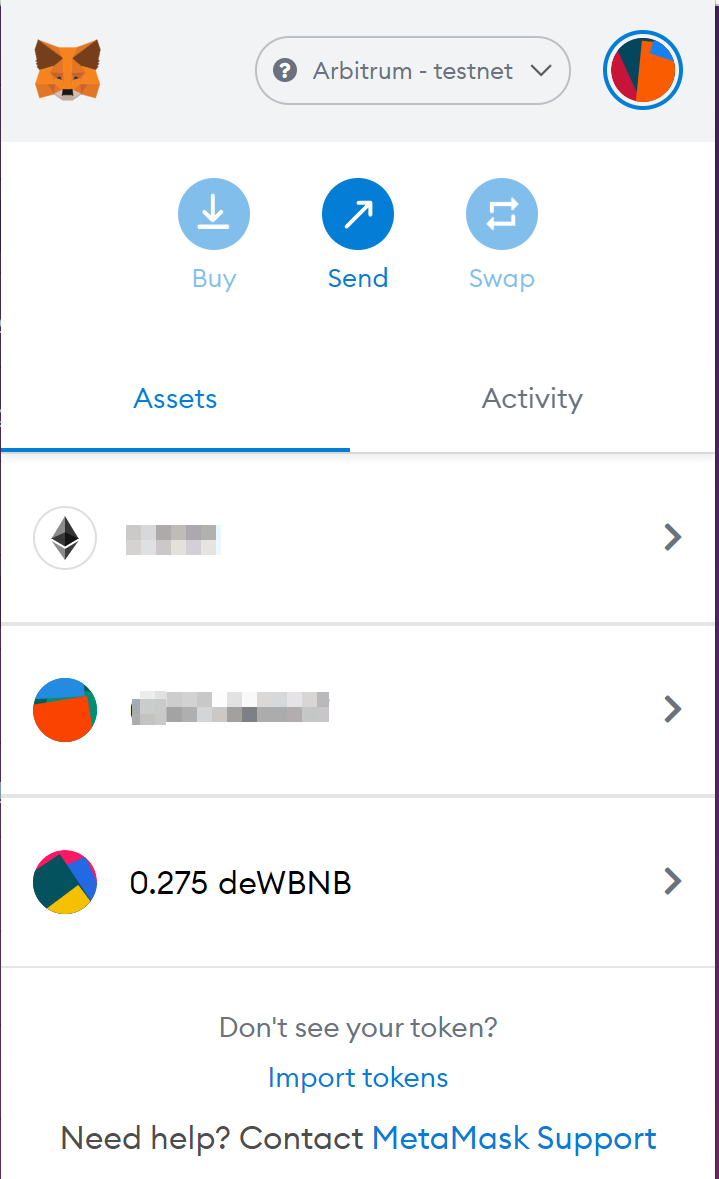
Step 4: Check that you’ve received the tokens in your MetaMask
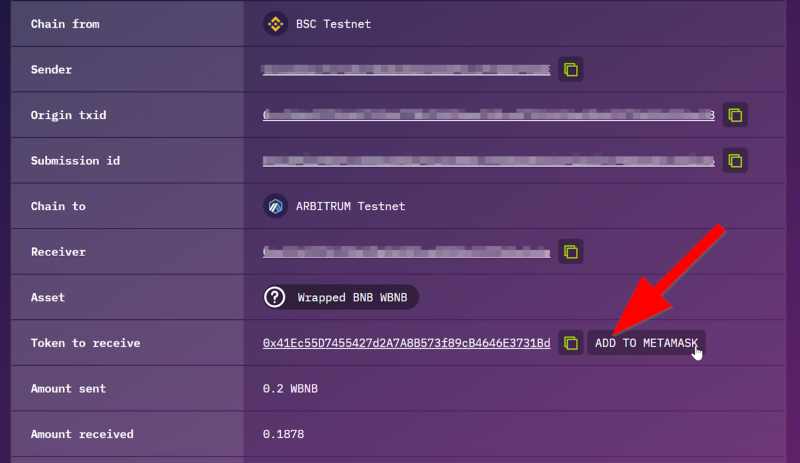
Token did not show up in MetaMask? Perhaps it hasn’t been imported. You’ll need to add that token to MetaMask.
If you encounter any issue, or have any feedback for deBridge, please reach out to us on Discord.
That’s it! You’re an early user of deBridge 🎉. We’ll have more features in the coming months, so stay tuned. 🌉
About deBridge
deBridge is a cross-chain interoperability and liquidity transfer protocol that allows truly decentralized transfer of assets between various blockchains. The cross-chain intercommunication of deBridge smart contracts is powered by a network of independent oracles/validators elected by deBridge governance. deBridge protocol is an infrastructure platform and hooking service which aims to become a standard for:
- Cross-chain composability of smart contracts
- Cross-chain swaps
- Bridging of any arbitrary asset and data
- Bridging of NFTs